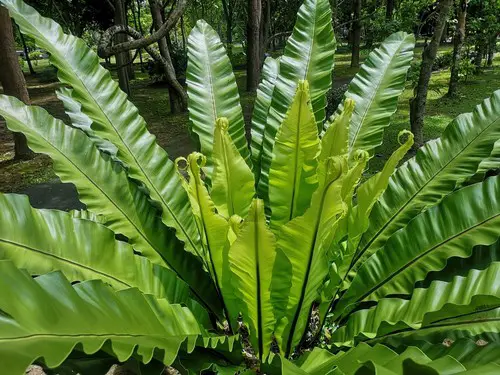
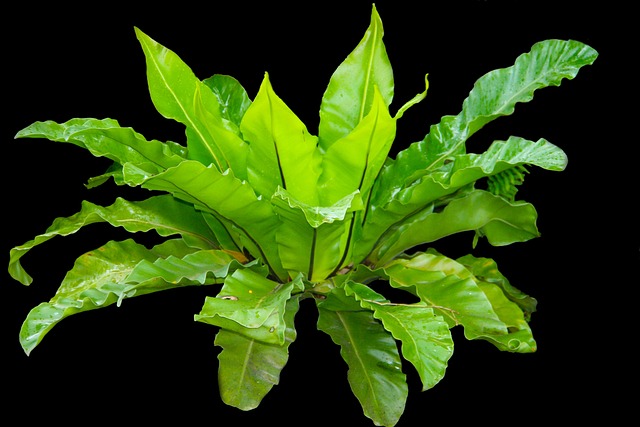
Bird’s Nest Ferns are a popular houseplant that can add a touch of greenery to any indoor space. However, if you notice your Bird’s Nest Fern turning yellow, it could be a sign of a problem. Understanding the causes of yellowing leaves on a Bird’s Nest Fern is essential to help you revive your plant and keep it healthy.
Identifying the cause of yellowing leaves on a Bird’s Nest Fern can be a bit challenging, as several factors can contribute to this issue. Overwatering, lack of light, and stress are some of the most common reasons why Bird’s Nest Ferns turn yellow.
Additionally, soil and drainage problems, nutrient deficiencies, and pests can also cause yellowing leaves. Understanding these factors can help you take the necessary steps to address the issue and prevent it from happening again.
Key Takeaways
- Identifying the cause of yellowing leaves on a Bird’s Nest Fern is crucial to revive the plant and keep it healthy.
- Overwatering, lack of light, and stress are some of the most common reasons why Bird’s Nest Ferns turn yellow.
- Soil and drainage problems, nutrient deficiencies, and pests can also cause yellowing leaves.
Check out these other popular posts:
- Why Is My Bird of Paradise Leaves Turning Yellow?
- Why Is My Aloe Vera Turning Yellow?
- Why Is My Alocasia Polly Turning Yellow?
Why Is My Bird’s Nest Fern Turning Yellow – 2 Common Problems
Yellow leaves on a bird’s nest fern can be a sign of several issues, including normal aging, disease, or pest infestation. Identifying the cause of yellow leaves is crucial to determine the appropriate treatment to save the plant.
Normal Aging
Yellow leaves on a bird’s nest fern can be a sign of normal aging. As the plant grows, the older leaves may turn yellow and fall off to make room for new growth. This is a natural process and is not a cause for concern. However, if the yellowing is excessive or accompanied by other symptoms, it could be a sign of a more severe problem.
Disease and Pests
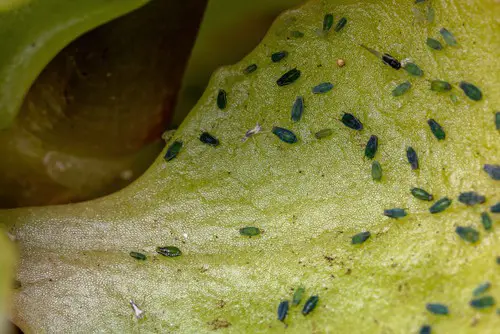
Yellow leaves can also be a sign of a disease or pest problem. Mealybugs, scale insects, and aphids are common pests that can infest bird’s nest ferns. These pests feed on the plant’s sap, causing damage to the leaves and stems. Foliar nematodes are another pest that can cause yellowing of the leaves.
In addition to pests, bird’s nest ferns can also be affected by diseases such as bacterial blight and crown rot. These diseases can cause yellowing of the leaves, along with other symptoms such as browning or wilting.
Identifying the cause of yellow leaves is essential to determine the appropriate treatment. If the problem is due to a pest infestation, the plant should be treated with an insecticide. If it is due to a disease, the affected plant parts should be removed, and the plant should be treated with a fungicide.
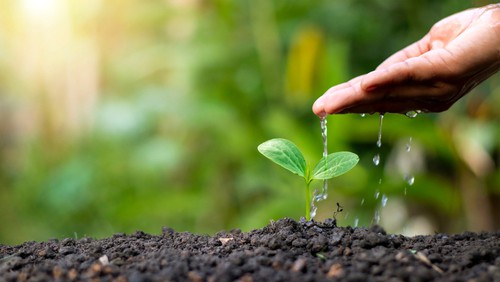
Watering Issues
When it comes to caring for a Bird’s Nest Fern, watering is one of the most important aspects to consider. Overwatering or underwatering can cause the leaves to turn yellow and eventually die. In this section, we will explore the watering issues that may cause your Bird’s Nest Fern to turn yellow and how to fix them.
Overwatering
Overwatering is one of the most common causes of yellowing leaves in a Bird’s Nest Fern. When the plant is overwatered, the roots are not able to absorb all the water, which leads to standing water in the pot. The excess water causes the roots to rot and the leaves to turn yellow.
To fix overwatering, the first step is to stop watering the plant until the soil dries out completely. It is essential to check the soil moisture level before watering the plant again. A moisture meter can be helpful in determining the soil’s moisture level. If the soil is still wet, it is best to wait a few more days before watering again.
Underwatering
Underwatering is another common cause of yellowing leaves in a Bird’s Nest Fern. When the plant does not receive enough water, the leaves start to wilt and turn yellow. The soil becomes dry, and the plant may start to shed its leaves.
To fix underwatering, the first step is to water the plant thoroughly until the water drains out from the bottom of the pot. It is essential to check the soil moisture level regularly and water the plant when the soil feels dry to the touch. Consistent moisture is key to keeping a Bird’s Nest Fern healthy.
Light and Temperature Conditions

1. Insufficient Light
Bird’s Nest Ferns require bright, indirect light to thrive. If the fern is not receiving enough light, its leaves may start to turn yellow. If the plant is placed in a low light area, it may be necessary to move it to a brighter location. A lack of light can also cause the fern to become leggy, with elongated stems and smaller leaves.
2. Excess Sunlight
While Bird’s Nest Ferns require bright, indirect light, they should not be exposed to direct sunlight. Direct sunlight can scorch the plant’s leaves, causing them to turn yellow or brown.
If the fern is placed near a window, it is important to ensure that it is not receiving too much direct sunlight. If necessary, move the plant to a location where it will receive filtered sunlight.
3. Temperature Factors
High temperatures can cause Bird’s Nest Ferns to wilt and their leaves to turn yellow. The ideal temperature for this plant is between 60-75°F (15-24°C). If the plant is placed in a location that is too hot, it may be necessary to move it to a cooler location.
On the other hand, if the plant is placed in a location that is too cold, it may also start to show signs of stress, such as yellowing leaves. It is important to keep the fern away from drafts and air conditioning units that can cause sudden temperature changes.
Soil and Drainage Problems
When it comes to the yellowing of a bird’s nest fern, soil and drainage problems can be a major factor. Here are some sub-sections to consider:
Poor Drainage
If the soil is not well-draining, the roots of the fern may become waterlogged and begin to rot. This can lead to yellowing of the fronds and even death of the plant. It is important to ensure that the pot has drainage holes and that excess water can escape.
If the pot does not have drainage holes, it is recommended to repot the fern into a pot that does have them.
Root Bound Situation
Another issue that can cause yellowing of the fronds is a root-bound situation. If the fern has been in the same pot for a long time, the roots may have grown to fill the entire pot, leaving no room for water or nutrients. This can lead to the yellowing of the fronds.
To fix this issue, it is recommended to repot the fern into a larger pot with fresh soil.
When repotting, it is important to ensure that the soil is well-draining and that there is enough space for the roots to grow. Adding mulch to the top layer of soil can also help retain moisture and provide nutrients to the fern.
Nutrient Deficiencies and Over-Fertilizing
Identifying Nutrient Deficiency
If your bird’s nest fern has yellowing leaves, it could be a sign of a nutrient deficiency. To identify the specific nutrient that is lacking, you need to look at the pattern of yellowing.
If the yellowing starts at the tips and progresses towards the center of the leaves, it could be a sign of nitrogen deficiency. On the other hand, if the yellowing starts at the base of the leaves and progresses towards the tips, it could be a sign of potassium deficiency.
Other nutrient deficiencies that can cause yellowing leaves in a bird’s nest fern include iron, magnesium, and sulfur. Iron deficiency can cause leaves to turn yellow with green veins, while magnesium deficiency can cause yellowing between the veins. Sulfur deficiency can cause overall yellowing of the leaves.
Effects of Over-Fertilizing
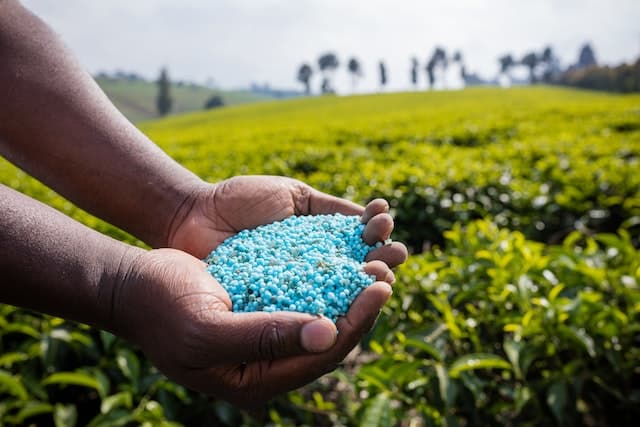
Over-fertilizing can also cause yellowing leaves in a bird’s nest fern. When you give your plant too much fertilizer, the excess salts can build up in the soil and cause root burn. This can prevent the plant from absorbing nutrients properly, leading to yellowing leaves and stunted growth.
In addition to yellowing leaves, over-fertilizing can also cause browning of the foliage, wilting, and even death of the plant. If you suspect that your bird’s nest fern is suffering from over-fertilization, you should flush the soil with water to remove the excess salts.
You should also reduce the frequency of feeding and use a balanced fertilizer with a lower concentration of nutrients.
It is important to note that nutrient deficiencies and over-fertilizing can have similar symptoms, so it is important to identify the specific cause of yellowing leaves before taking any corrective action.
Humidity and Misting
Low Humidity
One of the reasons why a bird’s nest fern may turn yellow is due to low humidity levels. This is especially common during the winter months when the air tends to be drier. When the humidity is low, the leaves of the fern may turn yellow and dry out. To prevent this, it is important to keep the air around the fern moist.
To increase humidity levels, place a tray of water near the fern or use a humidifier. Another option is to group plants together, as they release moisture through transpiration, which can help increase humidity levels.
Proper Misting
Misting is another way to increase humidity levels around a bird’s nest fern. When misting, it is important to do it properly. Misting too much can lead to fungal growth and other problems. On the other hand, misting too little may not provide enough moisture for the fern.
To properly mist a bird’s nest fern, use a fine mist spray bottle and mist the leaves once or twice a day. Be sure to avoid misting the soil, as this can lead to overwatering.
In addition to misting, it is important to make sure the fern is placed in an area with high humidity levels. This can be achieved by placing the fern in a bathroom or kitchen, where there is often more moisture in the air.
Dealing with Diseases and Pests
Recognizing Common Diseases
Yellowing fronds in bird’s nest ferns are often a sign of diseases or pests. It is essential to recognize the common diseases and pests that affect bird’s nest ferns to take appropriate measures.
One common disease that causes yellowing of fronds is bacterial blight. The fronds develop brown spots, and the center of the plant browns out when infected with bacterial blight.
Fungal infections can also cause yellowing, and the fronds may develop spots or streaks. Wilt is another disease that causes yellowing and wilting of the fronds.
Treating Pest Infestations
Pests such as scale, mealybugs, and spider mites can also cause yellowing of fronds in bird’s nest ferns. Scale insects, for example, are small and brown and attach themselves to the fronds.
Mealybugs, on the other hand, are white and cottony and feed on the sap of the plant. Spider mites are tiny and difficult to see without a magnifying glass. They cause yellowing and stippling of the fronds.
To treat pest infestations, it is essential to identify the pest and use the appropriate insecticide. Neem oil is an effective and natural insecticide that can be used to control pests in bird’s nest ferns.
It is safe to use and does not harm beneficial insects such as bees and ladybugs. For severe pest infestations, it is best to consult a professional.
Fungal infections can be treated with a fungicide, but prevention is always better than cure. Avoid overhead watering and ensure proper air circulation to prevent fungal infections. Remove infected fronds and dispose of them away from the plant to prevent the spread of the disease.
Care and Maintenance
Taking good care of your bird’s nest fern is essential to keep it healthy and vibrant. Here are some tips on how to maintain your bird’s nest fern.
1. Repotting Bird’s Nest Fern
Repotting your bird’s nest fern is necessary when the plant outgrows its container. This is usually evident when the roots start to grow out of the drainage holes or the soil dries out too quickly. Repotting should be done in the spring or summer when the plant is actively growing.
To repot your bird’s nest fern, gently remove it from its current container and shake off the excess soil. Inspect the roots and trim off any dead or damaged ones.
Place the plant in a larger pot with fresh potting soil, making sure to keep the crown of the plant at the same level as before. Water the plant thoroughly and place it in a bright, indirect light.
2. Pruning and Trimming
Pruning and trimming your bird’s nest fern is essential to keep it looking neat and tidy. It also helps to promote new growth and prevent the plant from becoming too leggy.
To prune your bird’s nest fern, use clean, sharp scissors or pruning shears to remove any dead or yellowing fronds. Cut the frond as close to the base of the plant as possible without damaging the healthy foliage.
To trim your bird’s nest fern, use the same tools to remove any brown or damaged tips from the fronds. This will help to prevent the plant from becoming too tall and spindly.
3. Low-Maintenance Varieties
If you’re looking for a low-maintenance bird’s nest fern, consider the Asplenium nidus ‘Crispy Wave’ or the Asplenium nidus ‘Victoria’. These varieties are known for their hardiness and ability to thrive in a variety of conditions.
4. Height
Bird’s nest ferns can grow up to 2 feet tall and wide, so it’s important to choose a container that is large enough to accommodate the plant’s size. It’s also important to provide the plant with enough space to grow and spread out.
5. New Growth
New growth on your bird’s nest fern is a good sign that the plant is healthy and happy. To encourage new growth, make sure to provide the plant with plenty of bright, indirect light and keep the soil moist but not soggy.
Propagation of Bird’s Nest Fern
Bird’s Nest Ferns can be propagated through spores or division. Propagation through spores can be a bit tricky for beginners, but once you figure out the method, it’s not that difficult.
To propagate through spores, wait for the fronds to develop spores on the underside. Once the spores are mature, collect them in a paper bag and let them dry for a day. Then, sprinkle the spores on top of a soil mix made of peat moss, perlite, and sand.
Cover the pot with clear plastic to create a humid environment and place it in a bright, indirect light. Keep the soil moist, and in a few weeks, the spores will start to germinate.
Propagation through division is a much simpler method. To propagate through division, remove the plant from its pot and gently separate the root ball into two or three sections. Each section should have a few fronds and a healthy root system. Then, plant each section in a new pot with fresh soil mix and water thoroughly.
Propagation is a great way to expand your collection of Bird’s Nest Ferns or share them with friends and family. It’s important to note that newly propagated plants may take some time to establish and grow, so patience is key.
Safety Considerations
When dealing with a Bird’s Nest Fern, it is important to consider the safety of both humans and pets. While the plant is not considered highly toxic, it can cause mild irritation if ingested. Here are some safety considerations to keep in mind:
- Poisonous: The Bird’s Nest Fern is not considered poisonous but can cause mild irritation if ingested. It is important to keep the plant out of reach of children and pets who may be tempted to chew on the leaves.
- Toxicity: While the plant is not highly toxic, it can cause mild irritation if ingested. The sap from the leaves can also cause skin irritation in some people. It is recommended to wear gloves when handling the plant to avoid skin irritation.
- Allergies: Some people may be allergic to the sap from the leaves of the Bird’s Nest Fern. If you experience any skin irritation or allergic reactions, it is recommended to wash the affected area with soap and water and seek medical attention if necessary.
- Pets: While the plant is not considered highly toxic to pets, it is still recommended to keep it out of reach of curious cats and dogs who may be tempted to chew on the leaves. If you suspect that your pet has ingested any part of the plant, it is recommended to contact your veterinarian immediately.
- First Aid: If you or your pet come into contact with the sap from the leaves of the Bird’s Nest Fern, it is recommended to wash the affected area with soap and water. If you experience any allergic reactions or symptoms of poisoning, seek medical attention immediately.
Frequently Asked Questions
What causes a bird’s nest fern to turn yellow?
There are several reasons why a bird’s nest fern may turn yellow. Overwatering is a common cause, as it can lead to root rot and prevent the plant from absorbing nutrients properly.
Lack of sunlight can also cause yellowing, as the plant needs moderate to bright indirect light to thrive. Stress from environmental factors such as temperature fluctuations, drafts, and pests can also contribute to yellowing.
How can I prevent my bird’s nest fern from turning yellow?
To prevent yellowing, it is important to provide proper care for your bird’s nest fern. This includes placing it in a location with moderate to bright indirect light, avoiding overwatering, and ensuring proper drainage.
Regularly dusting the leaves and misting the plant can also help prevent stress from environmental factors.
What are some common problems that cause a bird’s nest fern to turn yellow?
In addition to overwatering and lack of sunlight, pests such as spider mites and scale insects can cause yellowing. Bacterial blight and crown rot can also cause yellowing, and may require treatment with fungicides or removal of affected areas.
What is the best way to care for a bird’s nest fern to prevent yellowing?
To care for a bird’s nest fern, it is important to provide it with moderate to bright indirect light, avoid overwatering, and ensure proper drainage.
The plant prefers a warm environment with temperatures between 68º F and 80º F (20º C and 26.6º C). Regularly dusting the leaves and misting the plant can also help prevent stress from environmental factors.
How often should I water my bird’s nest fern to prevent yellowing?
The frequency of watering depends on the environment and the size of the plant. It is important to allow the top layer of soil to dry out slightly before watering, and to ensure proper drainage to prevent overwatering. Generally, watering once or twice a week is sufficient.
Can a bird’s nest fern recover from yellowing and how?
Yes, a bird’s nest fern can recover from yellowing with proper care. This includes addressing the underlying cause of yellowing, such as overwatering or lack of sunlight, and providing the plant with proper care going forward.
Pruning affected areas and treating with fungicides or insecticides may also be necessary in some cases.

Hey, I’m Lisa and I’ve been an avid gardener for over 30 years. I love writing, talking and living in the garden! Feel free to connect with me on my socials below
