Spider plants are a popular houseplant choice due to their easy maintenance and ability to thrive in various conditions. However, even the most experienced plant owners can encounter issues with their spider plants, such as drooping after repotting.
This can be a frustrating experience, but with the right knowledge and care, it is possible to revive your spider plant and prevent future issues.
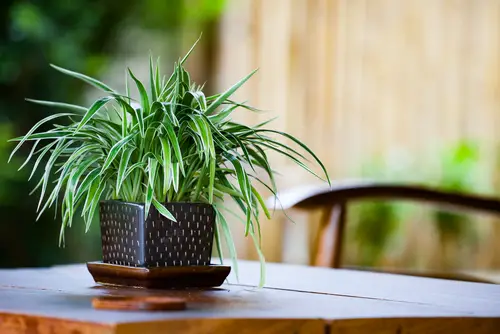
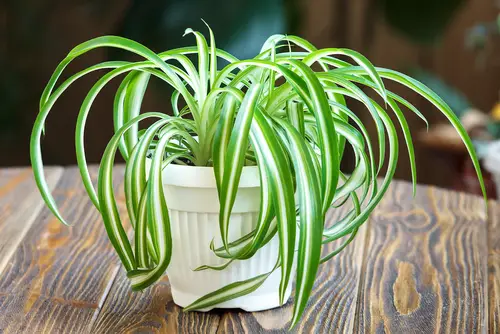
Understanding the spider plant is key to identifying and addressing the issue of drooping after repotting. Spider plants are known for their long, narrow leaves that grow in a rosette pattern.
They are typically grown in well-draining soil and prefer bright, indirect sunlight. Repotting is necessary when the plant has outgrown its container or the soil has become compacted. However, the process of repotting can cause stress to the plant, leading to drooping leaves.
Common issues after repotting can include overwatering, root damage, and shock from transplanting. Overwatering can cause the soil to become waterlogged, leading to root rot and drooping leaves. Root damage can occur during the repotting process, especially if the plant is handled roughly or the roots are disturbed.
Shock from transplanting can cause the plant to go into a state of shock, leading to drooping leaves and slow growth. Preventive measures and solutions include proper watering techniques, gentle handling during repotting, and gradually introducing the plant to its new environment.
Additional care tips include fertilizing, pruning, and monitoring for pests.
Key Takeaways on Spider Plant Drooping After Repotting
- Spider plants are popular houseplants that can encounter issues with drooping after repotting.
- Understanding the spider plant and the common issues after repotting is key to addressing the issue.
- Preventive measures and solutions include proper watering, gentle handling, and gradual introduction to new environments.
Also don’t miss:
Understanding the Spider Plant
Spider Plant Characteristics
The Chlorophytum comosum, commonly known as the spider plant, is a popular houseplant that is easy to care for and can thrive in a variety of conditions.
This plant is native to South Africa and is known for its long, slender leaves that can grow up to 18 inches in length. The leaves are typically green with white or yellow stripes, although there are also all-green varieties available.
One of the most distinctive features of the spider plant is its ability to produce small, white flowers that grow on long, thin stems. These flowers are typically produced in the summer and fall and can add a beautiful touch to any room.
Ideal Growth Conditions
To thrive, the spider plant requires a few key growth conditions. First and foremost, it needs plenty of light. While it can tolerate some shade, it prefers bright, indirect sunlight. If the plant is not getting enough light, it may begin to droop or wilt.
In addition to light, the spider plant also requires a moderate temperature range. It can tolerate temperatures as low as 50 degrees Fahrenheit and as high as 80 degrees Fahrenheit. However, it is important to avoid exposing the plant to extreme temperature fluctuations, as this can cause stress and damage.
Humidity is another important factor to consider when caring for the spider plant. While it can tolerate low humidity levels, it prefers a slightly more humid environment. If the air in your home is particularly dry, you may want to consider using a humidifier or placing a tray of water near the plant to increase humidity levels.
Repotting Process
When it comes to repotting a spider plant, there are a few things to keep in mind to ensure a successful transition. The following sub-sections will cover the important steps of the repotting process.
Choosing a New Container
The first step in the repotting process is selecting a new container. It’s important to choose a container that is slightly larger than the current one, but not too large. A container that is too large can lead to overwatering and root rot. Additionally, it’s crucial to choose a container with drainage holes to prevent water from accumulating in the soil.
Preparing the Plant
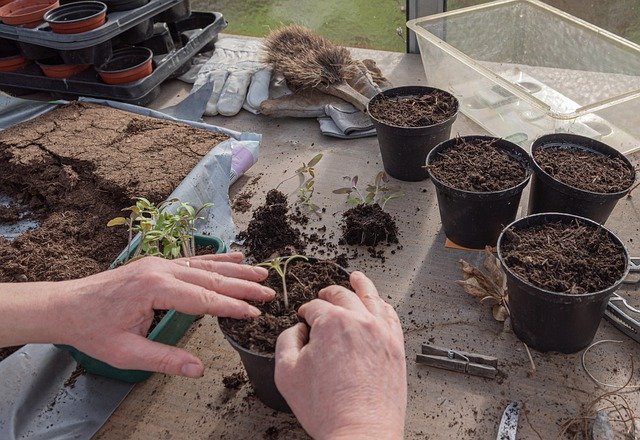
Before repotting, it’s important to prepare the plant. Start by watering the plant a day or two before the repotting process. This will help loosen the soil and make it easier to remove the plant from the container. Once the soil is moist, gently remove the plant from the container and loosen the roots.
Post-Repotting Care
After repotting, it’s important to take care of the plant to ensure a successful transition. Start by filling the new container with a well-draining potting soil mix. Adding perlite to the soil mix can also improve drainage.
Once the soil is in the container, place the plant in the center and fill in the remaining space with soil. Gently press the soil down to secure the plant in place.
Water the plant thoroughly after repotting, but avoid overwatering. It’s important to let the soil dry out slightly between waterings to prevent root rot. Additionally, it’s important to keep the plant in a location with bright, indirect sunlight to promote healthy growth.
Spider Plant Drooping After Repotting – 3 Common Problems
When repotting a spider plant, it is not uncommon to experience some issues. Here are some of the most common issues that can occur after repotting.
Drooping Leaves
One of the most common issues after repotting a spider plant is drooping leaves. This can be caused by a few different factors, including overwatering, poor drainage, root damage, or transplant shock.
To fix this issue, it is important to check the soil moisture level and make sure the soil is not too wet or too dry. The plant should be watered only when the top inch of soil is dry to the touch. It is also important to ensure that the pot has proper drainage and that the roots are not damaged.
Wilting and Dying
Another issue that can occur after repotting is wilting and dying. This can be caused by transplant shock, overwatering, or poor drainage. If the plant is suffering from transplant shock, it is important to give it time to recover. If the plant is overwatered, it is important to let the soil dry out before watering again.
Root Rot
Root rot is a common issue that can occur after repotting if the plant is overwatered or the soil does not have proper drainage. To prevent root rot, it is important to make sure the soil is well-draining and not too wet. If the plant is suffering from root rot, it may be necessary to repot the plant in fresh soil and trim away any damaged roots.
Preventive Measures and Solutions
1. Proper Watering
One of the most common reasons for spider plant drooping after repotting is over-watering or under-watering. Proper watering is crucial for the health of the plant.
It is recommended to water the plant when the top inch of soil is dry to the touch. Over-watering can lead to root rot and poor drainage, while under-watering can cause the plant to wilt and droop.
2. Optimal Light and Temperature
Spider plants require indirect sunlight and optimal temperatures for their growth. Direct sunlight can scorch the leaves and cause wilting. It is recommended to place the plant in a well-lit area with indirect sunlight.
The optimal temperature range for spider plants is between 60-80°F (15-27°C). High temperatures can cause wilting and drooping of the leaves.
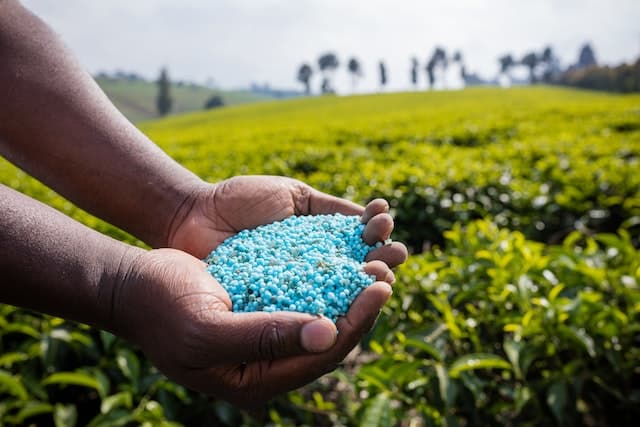
3. Regular Fertilizing
Fertilizing spider plants regularly can help prevent drooping and promote healthy growth. A balanced fertilizer with equal amounts of nitrogen, phosphorus, and potassium can be used every 2-3 months during the growing season.
Over-fertilizing can lead to burnt roots and poor growth, so it is important to follow the recommended dosage on the fertilizer package.
Monitoring Soil and Drainage
4. Monitoring the soil and drainage is crucial for the health of the spider plant. The soil should be well-draining and not waterlogged. It is recommended to use a pot with drainage holes to prevent water from accumulating at the bottom.
The soil pH should be between 6.0-7.5 for optimal growth. High humidity can also lead to poor drainage and root rot, so it is important to maintain proper ventilation.
Additional Care Tips
After repotting your spider plant, it is important to continue providing it with the proper care to prevent drooping and other issues. Here are some additional care tips to help your spider plant thrive.
Dealing with Pests
Spider mites are a common pest that can affect spider plants. These tiny insects can cause leaves to yellow and fall off, and can also cause webbing to appear on the plant.
To prevent and treat spider mites, regularly inspect your spider plant for signs of infestation and remove any affected leaves. You can also spray the plant with a mixture of water and neem oil to deter spider mites.
Supporting Root-Bound Plants
If your spider plant is root-bound, it may start to droop and show other signs of stress. To support a root-bound plant, consider repotting it into a larger container with fresh soil.
You can also gently loosen the roots and trim any that are overly long or tangled. Additionally, consider fertilizing your spider plant to provide it with the nutrients it needs to thrive.
When repotting a root-bound plant, it is important to be gentle and avoid damaging the roots. You can also use a root stimulator to encourage new root growth and help your spider plant establish itself in its new container.
Frequently Asked Questions
Why is my spider plant drooping after repotting?
Spider plants may droop after repotting due to root damage, transplant shock, overwatering, or insufficient light. When repotting, it’s important to handle the roots gently and ensure that the new pot has proper drainage.
Transplant shock can be minimized by gradually acclimating the plant to its new environment. Overwatering can cause root rot, while insufficient light can lead to weak growth and drooping.
How to save a dying spider plant after repotting?
To save a dying spider plant after repotting, first identify the cause of the problem. If the plant is suffering from root rot, remove it from the soil and trim away any damaged roots. Repot the plant in fresh soil with proper drainage and reduce watering.
If the plant is suffering from transplant shock, give it time to adjust to its new environment and provide it with proper care. Spider plants prefer bright, indirect light and well-draining soil.
Spider plant droopy and pale after repotting
If a spider plant is droopy and pale after repotting, it may be suffering from transplant shock or insufficient light. Transplant shock can cause the plant to lose color and become weak.
Ensure that the plant is receiving proper care and gradually acclimate it to its new environment. Insufficient light can also cause weak growth and pale leaves. Ensure that the plant is receiving bright, indirect light.
Spider plant wilting from cold after repotting
If a spider plant is wilting from cold after repotting, it may be suffering from cold damage. Spider plants prefer warm temperatures and can be damaged by cold drafts or temperatures below 50°F. Ensure that the plant is in a warm, draft-free location and protect it from cold temperatures.
Is it normal for plants to droop after repotting?
It is normal for plants to droop after repotting, as they may experience transplant shock or root damage. Give the plant time to adjust to its new environment and provide it with proper care. If the plant does not recover after a few weeks, it may be suffering from a more serious issue.
Will droopy spider plant leaves recover after repotting?
Droopy spider plant leaves may recover after repotting if the plant is given proper care and time to adjust to its new environment. Ensure that the plant is receiving proper light, water, and nutrients. If the plant does not recover after a few weeks, it may be suffering from a more serious issue.

Hey, I’m Lisa and I’ve been an avid gardener for over 30 years. I love writing, talking and living in the garden! Feel free to connect with me on my socials below
