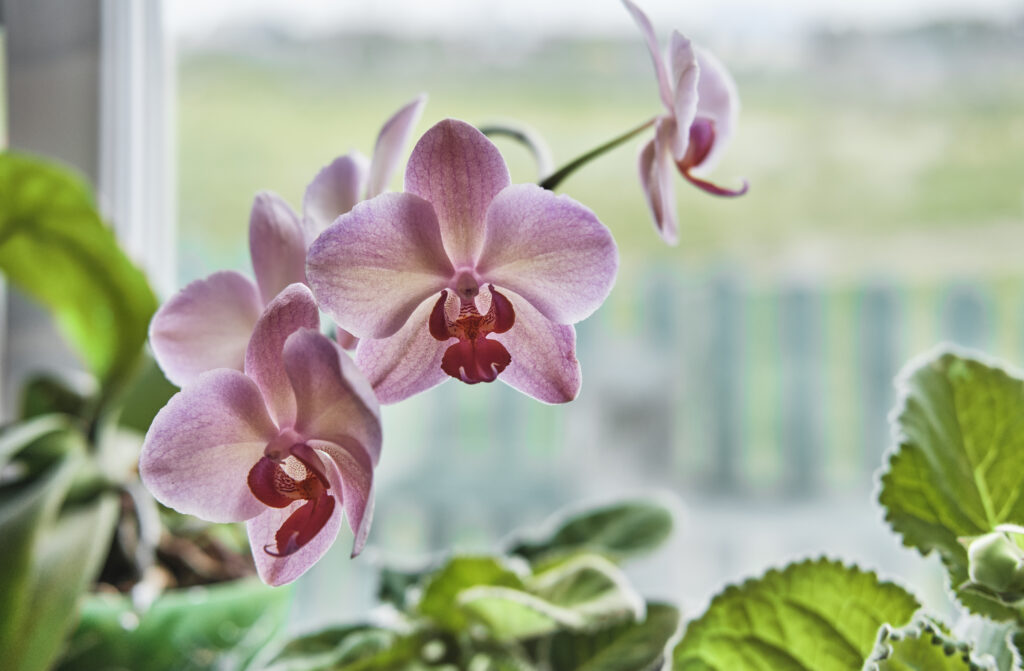
Orchids are beautiful and delicate plants that are prized for their colorful and exotic blooms. However, they can be quite finicky and require specific care to thrive.
One common issue that orchid owners face is brown roots. Orchid Roots Turning Brown can be a sign of root rot, a fungal disease that can quickly kill an orchid if left untreated.
Understanding orchid roots is essential to preventing brown roots. Orchid roots are different from other plant roots in that they are primarily used for anchoring the plant to its growing surface and absorbing moisture and nutrients from the air.
They are also covered in a spongy tissue called velamen that helps to regulate water uptake. When the velamen is damaged or destroyed, the orchid can no longer absorb water properly, which can lead to root rot and brown roots.
If you notice that your orchid roots are turning brown, it is essential to act quickly to prevent further damage. Detecting and treating root rot is crucial to saving your plant.
Repotting your orchid in fresh, clean soil is often necessary to remove any infected roots and prevent the spread of disease. Caring for your orchid after repotting is also important to ensure that it has the best chance of recovery.
Key Takeaways
- Understanding orchid roots is essential to preventing brown roots and root rot.
- Detecting and treating root rot quickly is crucial to saving your orchid.
- Repotting your orchid in fresh soil and caring for it properly after repotting can help prevent brown roots and keep your orchid healthy.
Also see:
Understanding Orchid Roots
Orchid roots play a crucial role in the survival of the plant. They are responsible for absorbing water and nutrients from the environment, anchoring the plant in place, and storing food reserves.
Understanding the different types of orchid roots, how they function, and what signs indicate healthy roots can help orchid growers maintain the health of their plants.
Types of Orchid Roots
Orchids have two main types of roots: aerial roots and terrestrial roots. Aerial roots are those that grow above the surface of the growing medium and are often covered with a spongy layer called velamen.
Velamen helps the roots absorb moisture and nutrients from the air. Terrestrial roots, on the other hand, grow in the growing medium and are responsible for absorbing water and nutrients from the soil.
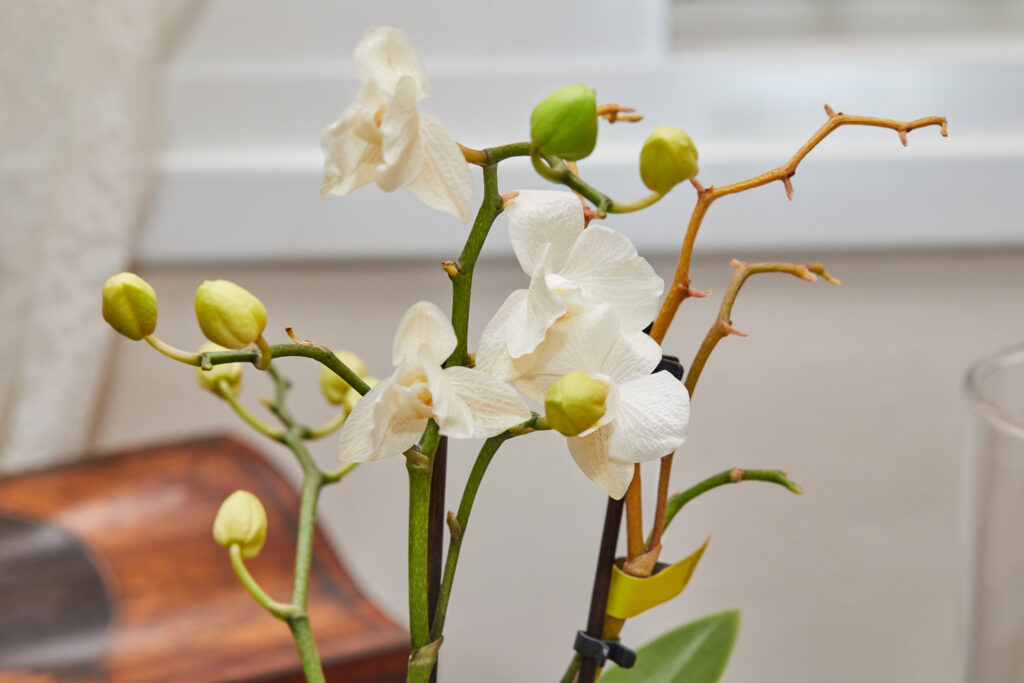
Orchids also have two types of aerial roots: new roots and old roots. New roots are thin and green and are actively growing, while old roots are thicker and often have a gray or brown appearance. Old roots may still be functional, but they are not actively growing and may not be able to absorb nutrients as effectively as new roots.
How Orchid Roots Function
Orchid roots function differently from other plant roots. They do not have root hairs, which are responsible for absorbing water and nutrients in most plants.
Instead, orchid roots have specialized cells called velamen that absorb moisture and nutrients from the air. This adaptation allows orchids to grow in a variety of environments, including trees and rocks.
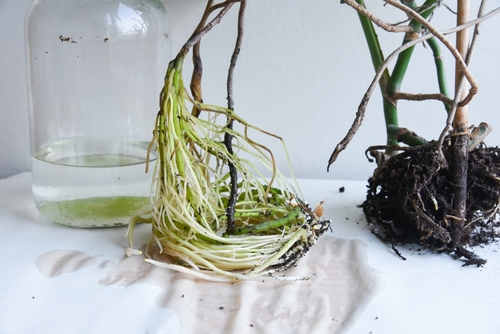
Signs of Healthy Orchid Roots
Healthy orchid roots are firm, plump, and white or green in color. They should not be mushy, brown, or have a foul odor, which are signs of root rot. Aerial roots should have a spongy, velvety texture, which indicates that the velamen is functioning properly. New roots should be actively growing and have a green color.
It is important to note that orchid roots naturally die off as new roots grow. This is a normal part of the plant’s growth cycle and should not be cause for concern unless a large number of roots are dying off at once.
Orchid Roots Turning Brown – 4 Common Problems
Orchid roots turning brown can indicate a variety of factors that can affect the health of the plant. Understanding the reasons why orchid roots turn brown can help prevent further damage to the plant and promote healthy growth.
1. Overwatering and Underwatering
Overwatering is one of the most common reasons why orchid roots turn brown. When the roots are consistently sitting in standing water, they can become waterlogged and start to rot, which can lead to brown roots.
On the other hand, underwatering can also cause brown roots. When orchids are not watered enough, the roots can dry out and become damaged, leading to brown roots.
To prevent overwatering or underwatering, it is important to find the right balance of moisture for your orchid. This can vary depending on the type of orchid and the environment it is in. A good rule of thumb is to water your orchid when the potting mix is almost dry to the touch.
2. Temperature and Humidity Factors
Orchids thrive in warm and humid environments. If the temperature is too cold or the humidity is too low, the orchid roots can become damaged and turn brown. It is important to keep the orchid in an environment that is warm and humid, but not too hot or too damp.
3. Sunburn
Orchids can also get sunburned, which can cause the roots to turn brown. This can happen when the orchid is exposed to direct sunlight for too long. To prevent sunburn, it is important to place the orchid in a location that receives bright, indirect sunlight.
4. Insect Infestation
Insect infestations can also cause orchid roots to turn brown. Pests such as spider mites, mealybugs, and scale insects can damage the roots and cause them to turn brown. To prevent insect infestations, it is important to keep the orchid clean and free of debris, and to inspect it regularly for signs of pests.
Detecting and Treating Root Rot
Root rot is a common problem that affects orchids. Catching it early is key to saving the plant. In this section, we will discuss the symptoms of root rot and the treatment options available.
Symptoms of Root Rot
The first sign of root rot is often brown, mushy roots. The roots may also have a foul odor. As the condition progresses, the leaves may turn yellow and drop off. If left untreated, root rot can kill the plant.
Another sign of root rot is the presence of fungi or mold on the roots. These fungi can spread quickly and cause further damage to the plant.
Treatment Options
If you suspect your orchid has root rot, the first step is to remove it from its pot. Gently remove the plant from the pot and examine the roots. If the roots are brown and mushy, they will need to be trimmed away.
Once you have removed the rotted roots, you can repot the plant in fresh potting soil. Be sure to use a pot with good drainage to prevent future problems.
In some cases, a fungicide may be necessary to treat the plant. There are many fungicides available that are safe for orchids. Be sure to follow the instructions carefully when using a fungicide.
Prevention is key when it comes to root rot. Be sure to water your orchid properly and avoid overwatering. Use a well-draining potting mix and allow the soil to dry out slightly between waterings. Regularly inspect your orchid for signs of root rot and take action immediately if you detect any problems.
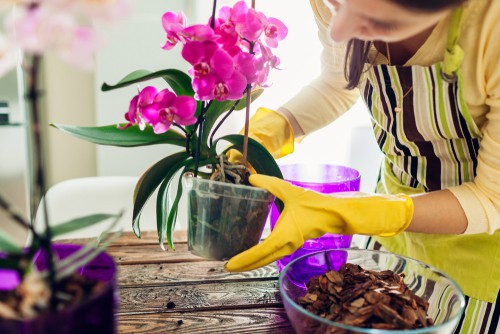
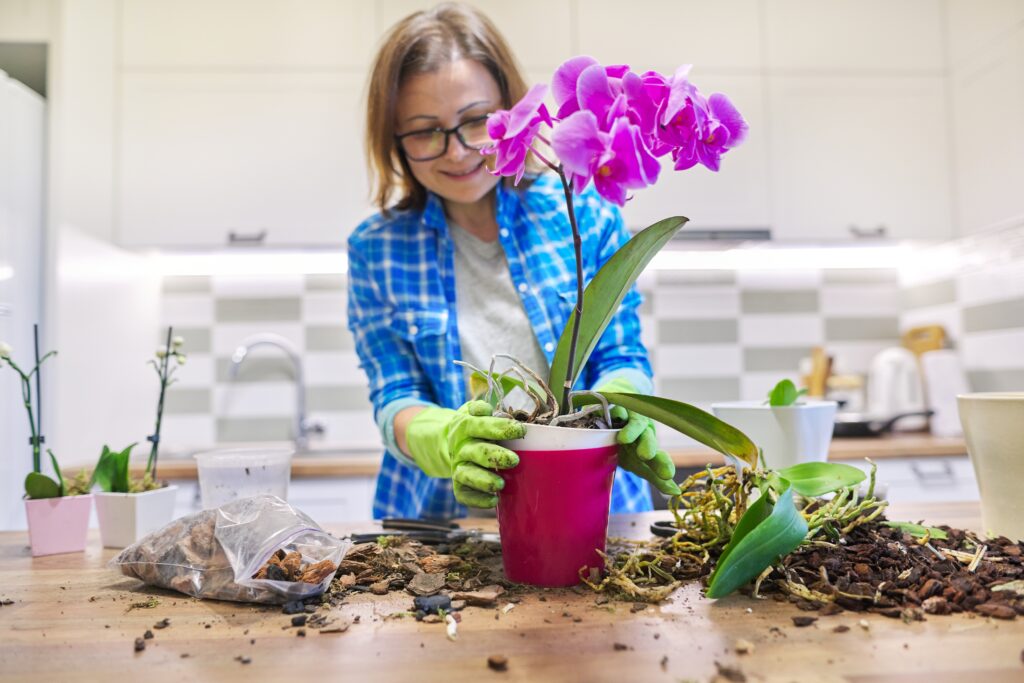
Repotting Your Orchid
When to Repot
Orchids typically need to be repotted every one to two years, depending on their growth rate and the size of their pot. Signs that it’s time to repot include overcrowded roots, roots growing out of the drainage holes, a potting mix that breaks down or becomes soggy, or a plant that has stopped growing or flowering.
Choosing the Right Pot and Potting Mix
When choosing a new pot, it’s important to select one that is only slightly larger than the current pot to avoid overpotting. The new pot should have drainage holes to allow excess water to drain out.
For the potting mix, there are several options available, including bark, sphagnum moss, perlite, and coconut coir. The type of potting mix used will depend on the type of orchid and its growing conditions. It’s important to choose a mix that provides good drainage and aeration to prevent root rot.
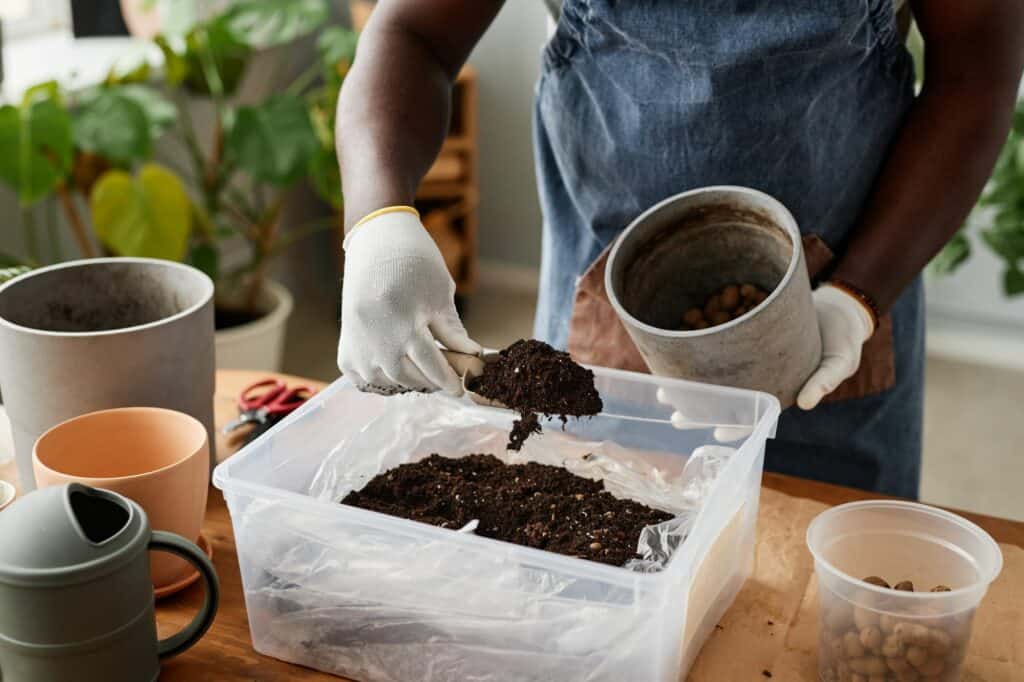
The Repotting Process
Before repotting, it’s important to water the orchid thoroughly to make it easier to remove from the pot. Once the orchid is removed from the pot, the old potting mix should be gently removed from the roots. Any dead or damaged roots should be trimmed away with clean scissors or shears.
The new potting mix should be placed in the bottom of the new pot, and the orchid should be placed on top, with the roots spread out evenly. The potting mix should be gently pressed down around the roots to hold the plant in place.
After repotting, the orchid should be watered lightly to avoid overwatering. It’s important to monitor the plant closely for the first few weeks after repotting to ensure that it is adjusting well to its new pot and potting mix.
Remember to repot your orchid regularly to keep it healthy and thriving.
Caring for Your Orchid After Repotting
After repotting your orchid, it’s essential to take care of it properly to ensure that it continues to thrive. Here are some tips on how to care for your orchid after repotting.
1. Watering Schedule
Watering your orchid after repotting can be tricky, as you don’t want to overwater or underwater the plant. It’s best to wait a few days after repotting to water your orchid to allow the plant to adjust to its new pot. After that, you can water your orchid once a week or when the potting mix feels dry to the touch.
2. Light and Temperature Requirements
Orchids require bright, indirect light to grow properly. After repotting, it’s best to keep your orchid in a shaded area for a few days to allow it to adjust to its new environment. Once it has adjusted, you can move it to an area with bright, indirect light.
Orchids also prefer a warm environment with temperatures between 60-85°F (15-29°C). Keep your orchid away from drafts and air conditioning vents, as they can cause temperature fluctuations that can harm your plant.
3. Fertilizing Your Orchid
Fertilizing your orchid can help it grow healthy and strong. After repotting, wait at least two weeks before fertilizing your orchid to allow it to adjust to its new pot. Use a balanced fertilizer with equal amounts of nitrogen, phosphorus, and potassium, and apply it every two weeks during the growing season.
4. Mist Your Orchid
Misting your orchid can help increase humidity levels around the plant, which can be beneficial, especially in dry environments. After repotting, it’s best to mist your orchid once a day for the first week to help it adjust to its new environment. After that, you can mist your orchid once or twice a week.d.
Preventing Brown Orchid Roots
Proper care and maintenance can help prevent orchid roots from turning brown. Here are some tips to keep your orchid roots healthy and vibrant:
Proper Watering Techniques
Overwatering is the most common cause of brown orchid roots. It is important to water your orchid only when the potting medium is dry to the touch. The frequency of watering will depend on factors such as humidity, light, and temperature. It is recommended to water your orchid early in the day to allow excess water to evaporate.
Maintaining the Right Environment
Orchids thrive in a humid environment with indirect light. It is important to keep the humidity level between 40% and 60%. You can use a humidifier or place a tray of water near your orchid to increase humidity. Avoid direct sunlight as it can cause sunburn on the leaves and roots.
Regular Inspections and Care

Regular inspections of your orchid can help you identify any issues before they become serious. Check the leaves and roots for any signs of damage, insects, or diseases. Remove any dead or damaged roots with a sterilized tool. It is also important to fertilize your orchid regularly with a balanced orchid fertilizer.
In addition to the above tips, it is important to ensure proper drainage and use a well-draining potting mix. Orchids absorb nutrients and water through their roots, so it is important to regularly inspect and care for them. By following these tips, you can help prevent brown orchid roots and keep your orchid healthy and vibrant.
Frequently Asked Questions
What are the symptoms of orchid root rot?
Orchid root rot can manifest in several ways. One of the most common symptoms is brown, mushy roots. The roots may also emit a foul odor. Infected roots may fall off the plant easily. In advanced cases, the leaves of the orchid may turn yellow and wilt.
How do I identify unhealthy orchid roots?
Healthy orchid roots are firm, white, and plump. Unhealthy roots may appear brown, black, or mushy. They may also have a foul odor. If the roots are easily removed from the potting mix, this is also a sign of unhealthy roots.
Can black spots on orchid roots be treated?
Black spots on orchid roots may indicate root rot or fungal infection. Treatment will depend on the severity of the problem. In mild cases, the affected roots may be trimmed and the plant may be repotted in fresh potting mix. In more severe cases, the plant may need to be treated with a fungicide.
What should I do if my orchid roots have brown spots?
Brown spots on orchid roots may indicate root rot or dehydration. If the problem is root rot, the affected roots should be trimmed and the plant should be repotted in fresh potting mix. If the problem is dehydration, the plant should be watered immediately.
How do I care for white orchid roots?
White orchid roots are healthy and should be left alone. They absorb moisture and nutrients from the potting mix and air. Overwatering can lead to root rot, so it’s important not to water the orchid too frequently.
Is it necessary to trim orchid roots?
Trimming orchid roots is not always necessary. However, if the roots are brown, mushy, or infected, they should be trimmed to prevent the problem from spreading. It’s important to use a sterile cutting tool and to apply a fungicide to the cut area to prevent infection.

Hey, I’m Lisa and I’ve been an avid gardener for over 30 years. I love writing, talking and living in the garden! Feel free to connect with me on my socials below
