
Clusias are popular ornamental plants that are known for their lush green foliage and attractive flowers. However, black spots on Clusia leaves can be a cause for concern. These spots can be a sign of various problems, including diseases, pests, and environmental factors.
Understanding the causes of black spots on Clusia leaves is essential for proper identification and treatment.
Black spots on Clusia leaves can be caused by several factors, including fungal diseases, bacterial infections, and insect infestations. Environmental factors such as overwatering, poor drainage, and excessive humidity can also contribute to the development of black spots.
Identifying the underlying cause of the black spots is crucial for effective treatment. In this article, we will explore the common causes of black spots on Clusia leaves and discuss how to identify and treat them.
Key Takeaways
- Black spots on Clusia leaves can be caused by fungal diseases, bacterial infections, and insect infestations, as well as environmental factors such as overwatering and poor drainage.
- Proper identification of the underlying cause of the black spots is essential for effective treatment.
- Preventive measures such as proper care and maintenance can help reduce the risk of black spots on Clusia leaves.
Check out these other related posts:
Understanding Black Spots on Clusia Leaves
Clusia plants are popular landscape plants due to their lush, tropical appearance and low maintenance requirements. However, these plants are not immune to diseases, and one of the most common issues that Clusia owners face is black spots on the leaves.
What are Black Spots on Clusia Leaves?
Black spots on Clusia leaves are a symptom of a fungal disease called leaf spot. This disease is caused by various fungi that thrive in warm, humid conditions.
The black spots are small, circular or irregularly shaped lesions that appear on the leaves. As the disease progresses, the spots may merge and form larger patches, causing the affected leaves to turn yellow and eventually fall off.
What Causes Leaf Spot?
Leaf spot is caused by various fungi that thrive in warm, humid conditions. The spores of these fungi are spread by wind, water, and insects, and can infect Clusia plants through wounds or natural openings such as stomata.
Overwatering, poor drainage, and overcrowding can also contribute to the development of leaf spot by creating a moist environment that is conducive to fungal growth.
How to Prevent and Treat Leaf Spot
Preventing leaf spot is the best approach to managing this disease. Here are some tips to prevent and treat leaf spot on Clusia plants:
- Plant Clusia plants in well-draining soil and provide adequate spacing to ensure good air circulation.
- Water Clusia plants deeply but infrequently to avoid creating a moist environment that promotes fungal growth.
- Avoid overhead watering, as this can splash water onto the leaves and spread fungal spores.
- Remove any infected leaves and dispose of them properly to prevent the spread of the disease.
- Apply a fungicide to the affected plants as directed by the manufacturer. Fungicides can help prevent the spread of the disease and may also help to control existing infections.
Black Spots on Clusia Leaves – 3 Common Problems
Clusia plants are known for their thick, waxy leaves that make them resistant to most pests and diseases. However, if you notice black spots on your Clusia leaves, it could be a sign of an underlying problem. In this section, we will discuss some of the common causes of black spots on Clusia leaves.
1. Overwatering and Poor Drainage
One of the most common causes of black spots on Clusia leaves is overwatering. When Clusia plants are overwatered, the roots become waterlogged, which can lead to root rot. As a result, the plant is unable to absorb water and nutrients, which can cause the leaves to turn black and eventually fall off.
To avoid overwatering, it is important to ensure that the soil is well-draining and that water does not accumulate in the bottom of the pot. It is also important to allow the soil to dry out between watering.
2. Fungal Diseases
Another common cause of black spots on Clusia leaves is fungal diseases. Fungal diseases such as black spot and leaf spot can cause black spots on the leaves of Clusia plants. These diseases are caused by a fungus that thrives in warm, humid conditions.
To prevent fungal diseases, it is important to keep the leaves of your Clusia plant dry. Avoid getting water on the leaves when you water the plant, and make sure that the plant has good air circulation.
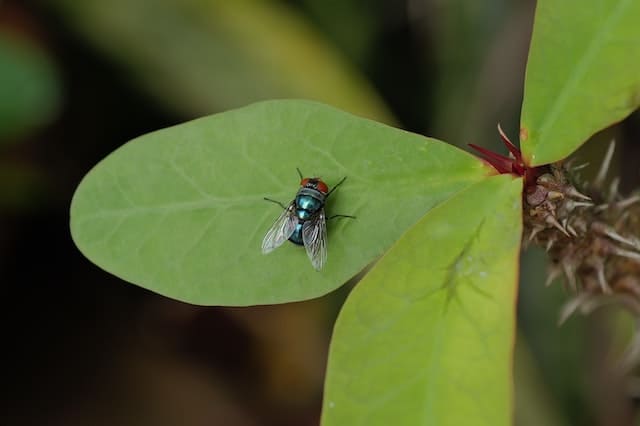
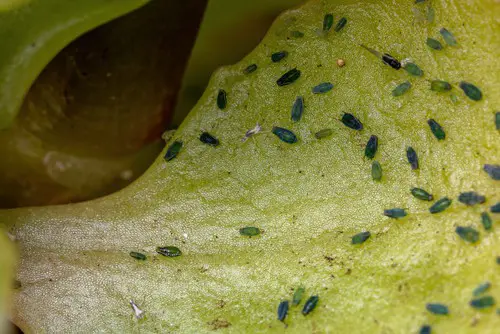
3. Pests and Insects
Mealybugs, scale, mites, and thrips are some of the pests and insects that can cause black spots on Clusia leaves. These pests feed on the sap of the plant, which can cause the leaves to turn black and eventually fall off.
To prevent pests and insects from infesting your Clusia plant, it is important to keep the plant clean and free from debris. You can also use insecticidal soap or neem oil to control pests and insects.
Environmental Factors Influencing Black Spots
Several environmental factors can cause black spots to appear on Clusia leaves. Understanding these factors and how to mitigate them can help prevent black spots from forming and keep your Clusia hedge healthy and vibrant.
1. Temperature and Weather Conditions
Temperature and weather conditions can play a significant role in the formation of black spots on Clusia leaves. High humidity and rain can create a moist environment that promotes the growth of fungal spores. Fungal spores can quickly spread and cause black spots on leaves.
To prevent black spots due to weather conditions, ensure that your Clusia hedge has proper drainage. Avoid overwatering and ensure that the soil is well-draining. Additionally, prune your hedge regularly to promote good air circulation and reduce humidity levels.
2. Sunlight Requirements
Clusia hedges require full sun to thrive. However, excessive sun exposure can cause damage to the leaves and result in black spots. Too much sunlight can cause the leaves to become dehydrated and stressed, making them more susceptible to fungal infections.
To prevent black spots due to excessive sun exposure, ensure that your Clusia hedge is receiving the right amount of sunlight. If your hedge is in direct sunlight for extended periods, provide some shade by planting taller trees nearby or using shade cloth.
3. Soil and pH Levels
Soil and pH levels can also influence the formation of black spots on Clusia leaves. Poor-quality soil or soil that is too acidic can cause stress to the plant, making it more susceptible to fungal infections. Additionally, soil that is too wet or poorly draining can also promote the growth of fungal spores.
To prevent black spots due to soil and pH levels, ensure that your Clusia hedge is planted in well-draining soil with a pH of 6.0 to 7.0. Test your soil regularly to ensure that it is not too acidic, and avoid overwatering your hedge.
Identifying and Treating Black Spots on Clusia
Clusia plants are susceptible to various diseases, and one of the most common is black spots on the leaves. This fungal disease can cause significant damage to the plant if left untreated. Fortunately, there are several effective ways to identify and treat black spots on Clusia.
1. Spotting the Initial Signs
The first sign of black spots on Clusia leaves is small brown or yellow spots that gradually grow larger and turn black. The affected leaves may also become distorted, and in severe cases, they may fall off the plant. It is essential to identify the disease early to prevent it from spreading to other parts of the plant.
2. Using Fungicides and Neem Oil
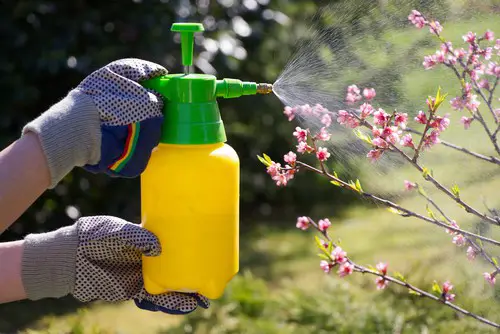
Fungicides and neem oil are effective treatments for black spots on Clusia. Fungicides work by killing the fungus that causes the disease, while neem oil works by suffocating the spores. When using fungicides or neem oil, it is crucial to follow the instructions carefully to avoid damaging the plant.
3. Proper Pruning and Disposal of Infected Leaves
Proper pruning is essential when treating black spots on Clusia. Infected leaves should be removed from the plant and disposed of immediately. This prevents the disease from spreading to other parts of the plant and other plants in the area. It is also important to sterilize pruning tools to prevent the spread of the disease.
Preventive Measures and Proper Care
Clusia plants are susceptible to black spots caused by fungal diseases, which can be prevented by following proper care and maintenance practices. Here are some preventive measures to keep your Clusia plants healthy and free from black spots.
Watering and Fertilizing Practices
Overwatering and improper fertilization can lead to the development of fungal diseases, including black spots. Clusia plants should be watered only when the top inch of soil is dry to the touch.
Water should be directed towards the soil and not on the leaves to prevent the growth of fungal spores. It is also important to avoid waterlogging the soil, which can lead to root rot.
Fertilizer should be applied during the growing season using a balanced fertilizer that contains equal amounts of nitrogen, phosphorus, and potassium. Over-fertilization can lead to the buildup of salts in the soil, which can be harmful to the plant.
Maintaining Good Air Circulation
Good air circulation is essential for preventing the growth of fungal spores. Clusia plants should be placed in an area with good air circulation, away from crowded spaces. This will help to reduce humidity levels, which can lead to the growth of fungal spores.
Regular Trimming and Maintenance
Regular trimming and maintenance are essential for keeping Clusia plants healthy and free from black spots. Dead and diseased leaves should be removed promptly to prevent the spread of fungal diseases. The plant should also be pruned regularly to maintain its shape and size.
Clusia Species and Their Susceptibility to Black Spots
Clusia plants are known for their hardy nature and low maintenance requirements, making them a popular choice for landscaping and indoor decoration. However, one issue that can arise with these plants is the appearance of black spots on their leaves.
Understanding which Clusia species are more susceptible to this issue can help gardeners prevent and treat it effectively.
Clusia Guttifera
Clusia guttifera, also known as the Florida Clusia, is a popular species of Clusia plant that is native to Florida, the Caribbean, and Central and South America. This species is known for its large, glossy leaves and its ability to tolerate a wide range of environmental conditions.
However, Clusia guttifera is also quite susceptible to black spots on its leaves. This issue is typically caused by a fungal infection, which can be exacerbated by high humidity levels and poor air circulation.
To prevent black spots on Clusia guttifera leaves, gardeners should ensure that the plant is not overwatered, and that it is placed in an area with good air circulation.
Clusia Rosea
Clusia rosea, also known as the Autograph Tree, is another popular species of Clusia plant that is native to the Caribbean and Central and South America. This species is known for its thick, leathery leaves, which are often used for writing messages or signatures.
While Clusia rosea is generally a hardy plant, it can also be susceptible to black spots on its leaves. This issue is typically caused by a fungal infection, which can be exacerbated by overwatering and poor drainage.
To prevent black spots on Clusia rosea leaves, gardeners should ensure that the plant is not overwatered, and that it is placed in an area with good drainage.
Frequently Asked Questions
How do you treat black spot fungus on plants?
To treat black spot fungus on plants, it is important to remove infected leaves and dispose of them properly. Prune the plant to increase air circulation and reduce humidity around the plant.
Apply a fungicide to the plant, following the instructions on the label carefully. Repeat the treatment as necessary to ensure that the fungus is completely eradicated.
What causes black spots on plant leaves?
Black spots on plant leaves are often caused by a fungal infection, such as black spot fungus. This fungus thrives in warm, humid environments and can spread quickly from plant to plant. Overwatering and poor air circulation can also contribute to the growth of black spot fungus.
Are black spots on Clusia leaves harmful?
Black spots on Clusia leaves can be harmful to the plant if left untreated. The fungus can spread quickly and cause the leaves to yellow and fall off, weakening the plant. If the infection is severe, it can even kill the plant.
How can I prevent black spots from forming on my plants?
To prevent black spots from forming on your plants, it is important to maintain good plant hygiene. Remove any infected leaves and dispose of them properly. Prune the plant to increase air circulation and reduce humidity around the plant.
Water the plant at the base to avoid getting the leaves wet. Use a fungicide on the plant as a preventative measure, following the instructions on the label carefully.
What are some natural remedies for black spots on plants?
Some natural remedies for black spots on plants include spraying the plant with a mixture of baking soda and water, using a neem oil spray, or applying a solution of chamomile tea and water to the plant.
However, it is important to note that these remedies may not be as effective as chemical fungicides and may need to be applied more frequently.
Can black spot fungus spread to other plants in my garden?
Yes, black spot fungus can spread quickly from plant to plant in your garden. It is important to remove any infected leaves and dispose of them properly to prevent the fungus from spreading.
Prune the plants to increase air circulation and reduce humidity around the plants. Use a fungicide on the plants as a preventative measure, following the instructions on the label carefully.

Hey, I’m Lisa and I’ve been an avid gardener for over 30 years. I love writing, talking and living in the garden! Feel free to connect with me on my socials below
