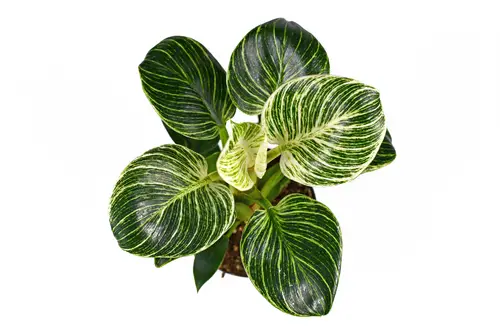
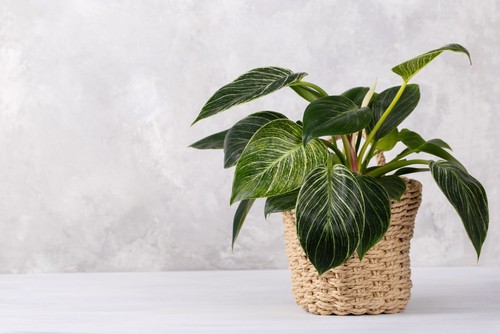
With its large, striped leaves that change color from white to green as they mature, it’s no wonder that these attractive plants are quite coveted as houseplants. Philodendron birkin is hardy and can be difficult to find in stores, so knowing how to propagate your own is a great idea.
There are three propagation methods by which to multiply your philodendron birkin: the stem cutting method, the division method, and air layering. Each have varying levels of difficulty, but with the right steps, tools, and our trusted guide, propagating your philodendron birkin doesn’t have to be a daunting endeavor.
Propagating your Philodendron Birkin not only ensures that you have more plants to enjoy, but it can also be a great way to share them with friends and family.
Read on to learn more about Philodendron Birkin Propagation, including step-by-steps guides for each method and the answers to some frequently asked questions (FAQs).
Why Should I Propagate my Philodendron Birkin?
One of the most common reasons houseplants enthusiasts propagate philodendron birkins is because of their size. These plants can grow quite large, often outgrowing their pots, which can negatively impact your plant’s health.
Cutting back your philodendron’s size can encourage healthier growth and cut away scraggly leaves. Since these plants can be difficult to find in stores or nurseries, propagating your philodendron can mean having more plants without having to search for and buy more.
Propagation of Philodendron Birkin offers several benefits for houseplant enthusiasts. One of the main reasons to propagate these plants is to manage their size. As Philodendron Birkins grow, they can outgrow their pots, which can negatively affect their overall health.
By propagating and cutting back the size of the plant, you can promote healthier growth and remove scraggly leaves. Additionally, since these plants are often difficult to find in stores or nurseries, propagating them allows you to have more plants without the need to search for and purchase them.
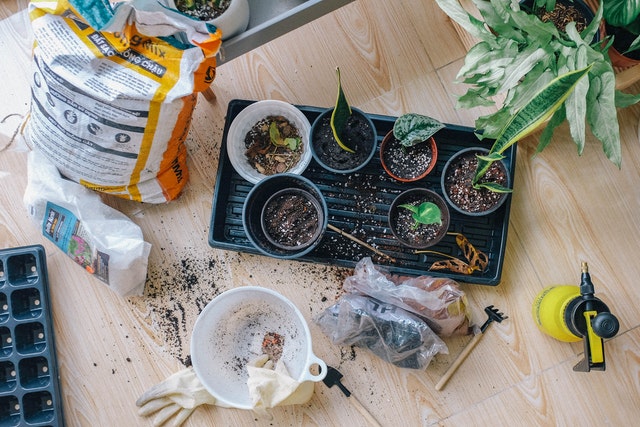
What You Will Need Before Philodendron Birkin Propagation
Before you begin either of the three propagation methods, it is important to have the right tools. You will need:
- Mature, healthy philodendron birkin
- Sharp shears or scissors
- Container or bowl
- Spare pot (or pots, if you are making multiple cuttings)
- Fresh soil and water
- Toothpick, peat moss, and plastic wrap (only needed for third method, air-layering)
Method 1: Stem Cutting
The stem cutting method is the simplest and most common approach for propagating Philodendron Birkin plants. It is recommended for beginners in houseplant propagation.
This section explains step-by-step instructions for locating the stem cutting, making the cut, removing lower leaves, placing the cuttings in water, changing the water regularly, and eventually planting the rooted cuttings in potting soil.
Step 1: Locate your stem cutting
On your philodendron, locate the area on the stem where you plan to make your cutting. Unlike some other houseplants, the philodendron birkin can only be propagated through stem rather than leaf cuttings.
The section you choose should have at least one node – a stem joint out of which roots appear – and should be a healthy, mature philodendron birkin.
Step 2: Make the cut
Use clean scissors or shears when you make the cut, to avoid contaminating or infecting your plant with bacteria or other harmful microbes. Make a diagonal cut in order to increase the cutting’s surface area, which will make propagation easier.
Step 3: Strip away lower leaves
Carefully remove any lower leaves after removing your stem cutting, as the cuttings will be sitting in water for a long period of time and any extra leaves will rot and contaminate the water.
Step 4: Fill container with fresh water
Take your container – not the new pot, as that will be used to plant your new seedlings once they sprout roots – and fill it with fresh water. Make sure the water is lukewarm. Water that is too hot or too cold will send the cuttings into shock and kill them.
Step 5: Place cuttings in water
When you place your cuttings in the water, make sure the nodes are submerged in the water so roots can sprout from them. Then place your container in a bright spot with indirect sunlight, as direct sun will damage your cuttings.
To promote speedy and healthy root growth, you can add rooting gel – which contains a rooting hormone that will trigger growth in your cuttings.
You should start to see roots in 2 – 4 weeks.
Step 6: Regularly change water
To keep your water free from bacteria, change out the water every 2 – 3 days.
Step 7: Plant cuttings in potting soil
After 2 – 4 weeks, you should begin to see roots growing from the nodes. Once the roots are a few centimeters long, the cuttings are ready to be planted in soil. Fill your spare pot (or pots, if using multiple cuttings) with potting soil and plant your cuttings. Now they can be cared for just like adult philodendron birkins.
Method 2: Division
This philodendron birkin propagation method is relatively easy for beginners but should only be used if there are several offshoots sprouting from the mother plant. Otherwise, use the stem cutting method.
The division method is suitable when the mother plant has several offshoots sprouting.
This section provides guidance on locating the offshoots, removing the plant from its pot, separating the sections by detangling the roots, and choosing between placing them in water or pots with soil. It emphasizes the importance of maintaining regular plant care after propagation.
Step 1: Locate offshoots
Locate where the various offshoots are, so you can easily divide them in the following steps.
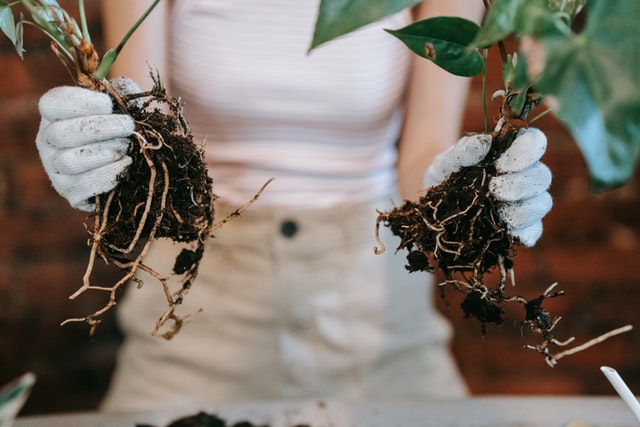
Step 2: Remove plant from pot
Remove the plant from its pot and gently shake off the dirt so the root system is visible.
Step 3: Separate sections
Divide the various offshoots by detangling the roots. It’s all right to use your scissors or shears to separate the sections, and make sure each section has many roots for successful propagation.
Step 4: Place in water or fresh soil
For this method, you can place the divided sections either in water or pots of their own with soil.
Step 5: Proceed with normal plant care
This step is self-explanatory.
Method 3: Air Layering
The air layering method is more complex and recommended for experienced gardeners.
This section outlines the steps involved, including locating a healthy stem, making a vertical cut, holding the incision open with toothpicks, applying damp peat moss, sealing the incision with plastic wrap, and cutting off the stem once new roots have sprouted.
Step 1: Locate healthy stem
Use a strong, healthy part of the stem for this method.
Step 2: Make vertical cut in stem
Using clean shears or scissors, make a vertical cut several inches long that penetrates about halfway through the stem.
Step 3: Open incision
Use toothpicks to hold open the incision rather than your fingers, since toothpicks are finer and less likely to pass bacteria into your plant.
Step 4: Apply peat moss to incision
Dampen the peat moss before stuffing it into the incision.
Step 5: Seal in peat moss
Using plastic wrap, tightly seal up the incision with the peat moss inside.
Step 6: Cut off stem once new roots sprout
In several weeks, you should see new root growth from the incision. Now it’s safe to cut off the stem from the mother plant and plant it in its own pot.
Also read: Begonia Maculata Propagation
Summary
Regardless of which method you choose, as long as you follow the steps, you are likely to be successful in your propagation efforts.
The first method – stem cutting – can be used for any healthy and mature philodendron birkin with at least one node. The second method should only be used with very large philodendrons that have several offshoots, and the third method – air layering – should only be used by experienced houseplant propagators, as it can be difficult and finicky with a lower rate of success.
Frequently Asked Questions
What’s the best time of year for philodendron birkin propagation?
Spring is the best season to propagate as it is usually warmer with better light. Cold weather can stunt your propagation efforts. If planting in autumn or winter, houseplants go into dormancy, and you’ll see little – if any – growth.
Can I propagate my philodendron from a single leaf?
No. Only stem cuttings are viable, and any leaves attached to the cuttings when in water will rot.
Can I use a grow light for my stem cuttings?
Philodendron birkins need bright but indirect sunlight, but a grow light can be used if you don’t have sufficient lighting. They are great for seedlings, as young plants usually need more light and warmth.
What is The Best Time for propagating Philodendron Birkin
Spring, with its warmer temperatures and better light conditions, is the optimal season for propagation. Propagation during autumn or winter may result in limited growth due to the plant’s dormancy.

Hey, I’m Lisa and I’ve been an avid gardener for over 30 years. I love writing, talking and living in the garden! Feel free to connect with me on my socials below